



What Is a Trimless Profile and When to Use It
No bezel, no visible frame — the plaster runs into the aperture. What holds it in, why joints crack, and what you cannot change later.
A trimless profile is a recessed body with no visible flange. Perforated side wings bury under joint compound, so after sanding and painting only the light aperture remains. No metal edge, no 5–10 mm bezel. The gain is a flush line. The cost is permanence: once the ceiling closes, nobody can adjust, re-aim or reach the body.
What is the difference from a flanged profile?
Both sit in a slot. What covers the cut edge differs.
| Flanged (trimmed) | Trimless (plaster-in) | |
|---|---|---|
| Visible edge | 5–10 mm metal bezel | Keine |
| Covers a rough cut | Yes: the flange hides 3–5 mm of error | No: plaster meets the aperture |
| Fixing to the board | Screws or clips through the flange | Perforated wings screwed to the board, then mudded |
| Fertigstellen | Anodized or powder-coated | The ceiling paint itself |
| Repaint later | Yes, the bezel keeps its own color | Yes, the whole surface repaints together |
| Access to the driver | Through the flange or a separate hatch | Only through the aperture or a hatch |
| Skill required | Carpenter or electrician | Plasterer, and a good one |
| Reversible | Ja | Effectively no |
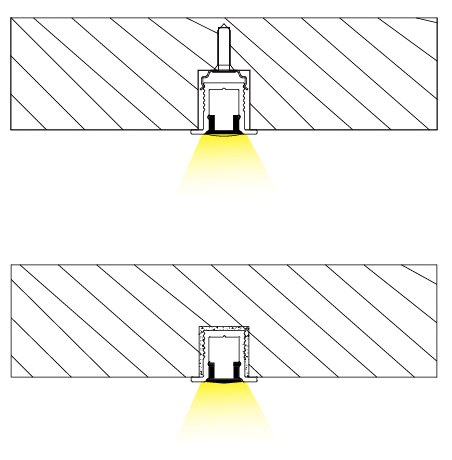
One difference explains the rest. A flange covers mistakes, and trimless has none. That single fact drives most of the cost, most of the failures, and why trimless appears on high-end work and gets skipped on fast work.
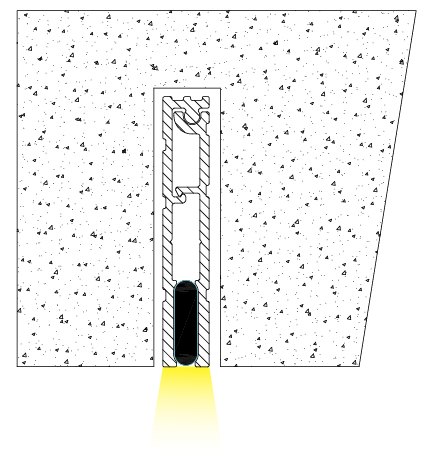
What actually holds a trimless body in the plaster?
Not the compound. Compound is filler; structure sits behind it.
- Perforated wings screw through the board into its backing, whether studs, noggins or a rail. Compound grips the wing, so it must sit flat.
- Fiberglass mesh tape beds into the first coat across wing and board joint, the way a drywall seam gets taped.
- Three thin coats, never one thick one. Each coat shrinks as it cures, and a single heavy fill shrinks enough to crack along the wing.
- Sand, prime, paint. The aperture edge is the only place the profile shows, so that edge sets the quality of the whole detail.
Skip step 1 or 2 and the joint will crack. The failure is predictable, and people describe it as "the plaster cracked above the light." The cause is a wing never fixed to anything solid.
Why do trimless joints crack?
Three causes, ordered by frequency.
The wing floated instead of sitting flat. Plasterboard flexes; aluminum does not. Any gap behind the wing becomes a hollow, and the hollow becomes a hairline crack along the full length within one heating season.
No mesh tape. Compound alone has almost no tensile strength across a joint. Tape carries the movement.
One thick coat instead of three thin ones. The material shrinks, the wing does not, and the crack forms at the interface.
A fourth cause hides in plain sight: thermal movement of the profile. An aluminum body in a warm ceiling expands slightly more than plaster around it. So break a trimless run into lengths with a small gap at each joint, instead of running one 8 m piece.
How does a trimless detail affect the program?
It moves work earlier and adds a stage other details never need.
| Stage | What has to happen | Who |
|---|---|---|
| First fix | Framing, backing rails, cable, driver position | Electrician and carpenter |
| Body fixing | Wings screwed to framing, before boarding closes | Carpenter |
| Boarding | Board cut to the aperture, not around the wing | Drywaller |
| Taping | Mesh tape bedded across wing and board joint | Drywaller |
| Compounding | Three thin coats, sanding between | Plasterer |
| Painting | Ceiling finish over everything, wings included | Painter |
| Strip fitting | After painting, through the aperture | Electrician |
Two consequences need planning.
The body goes in before the ceiling finishes, but the strip goes in after. That leaves days or weeks when the profile sits open and full of dust. Cap the ends and tape over the aperture during sanding. Plaster dust in a channel is hard to remove, and it defeats the adhesive.
If the position changes late, the cost is not the profile. Moving a flanged body means unscrewing it. Moving a trimless one means cutting out board and redoing the joint, and that lands on the finishing trade, not the electrical one.
What can't you do afterwards?
Four things worth knowing before the ceiling closes.
- Change the strip. The aperture is the only access. A long run means working through a slot, and a narrow section may make that impossible.
- Change the driver. Without a planned hatch, the driver stays where it was left. Plan access before the board goes up.
- Re-aim the line. Unlike a suspended profile, nothing adjusts later.
- Re-cover a mistake. A flanged body can take a wider flange. A trimless one leaves a hole the exact size of the error.
That last point explains why architects draw trimless details instead of site crews choosing them.

When is a flanged profile the better answer?
Four situations where the bezel is not a compromise but the correct detail.
- Retrofit. A finished ceiling cannot take a plaster-in detail without opening up.
- Service access matters, as on a commercial run where the driver will be replaced at least once.
- The ceiling is not being repainted. A flanged body installs without touching surrounding finish.
- The slot gets cut by someone who is not a plasterer. The flange absorbs the tolerance.
Our ceiling collection runs to 20 profiles and includes both kinds. For a trimless detail, choose the body for wing geometry, not aperture alone. The ceiling range lists every section.
How do you specify one?
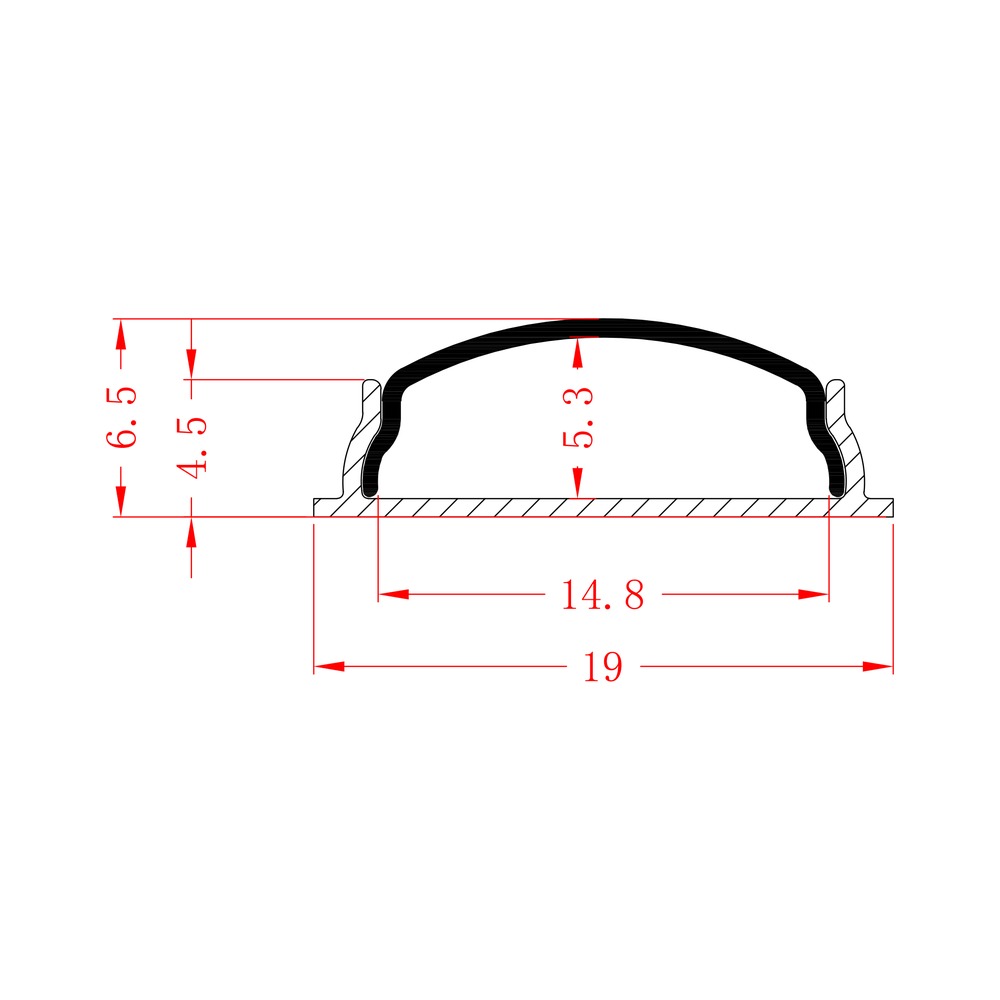
Five figures, and the first two are where it goes wrong.
- Slot width and depth, taken from the section drawing, not from aperture size.
- Board thickness at the reveal, because the wing must land on something.
- Wing type: perforated, serrated or angled. Each takes compound differently.
- Who does the finishing, and whether they have done a plaster-in light before.
- Where the driver goes, and how someone reaches it in five years.
Write those five down and the detail usually works. Leave them to site and the crack appears in the first winter.
Is trimless worth the extra cost?
Where the ceiling itself is the design, yes. Nothing else produces that result. Where the ceiling is a service void with a grid in it, the extra labor buys little.
Can you install a trimless profile in an existing ceiling?
Only by cutting out a strip, fitting framing, and re-boarding and re-finishing it. In practice the whole ceiling usually gets skimmed afterwards, so the small patch is rarely small.
How do you stop the joint cracking?
Fix wings to framing, tape the joint with fiberglass mesh, and build compound in three thin coats. Those three steps prevent almost all of it, and no sealant substitutes for them.
Can I use a trimless profile on a wall?
Yes, and it is common in niches and vertical reveals. The same rules apply, with one addition. A vertical run sees more thermal cycling from room air than a ceiling does, so break the joint at floor and head height.
What happens if the strip fails?
It gets replaced through the aperture, working along the run. On a wide section that is straightforward. On a 10 mm slot it may mean opening the ceiling and accepting a repair. Plan the section with that day in mind.
See also: recessed vs surface vs suspended, und HL-A092 for the shallow-chase case.

Wir entwickeln und liefern LED-Aluminiumprofile und lineare Beleuchtungssysteme – über 200 Profile mit passenden Diffusoren und Befestigungselementen – und beliefern seit 2007 Kunden in mehr als 100 Ländern.
Translation and copy review — terminology, clarity and consistency of the English text.
Weiterführende Literatur


Teilen Sie uns die Streifenbreite, die Lauflänge und den Bestimmungsort mit – wir wählen das passende Profil, den Diffusor und die Beschläge aus und unterbreiten Ihnen innerhalb eines Werktags ein Angebot.
Starten Sie Ihre Anfrage